To start sending and receiving email messages signed and/or encrypted with the OpenPGP standard, you need to either create and/or import a PGP key pair and share your public key (to be able to receive encrypted messages) and import public keys from other people (to be able to send them encrypted messages). Both operations can be done with PGP Setup Wizard under the Tools menu. It guides you trough the process of creating/importing the PGP key pair and importing public keys.
The first step provides general information about PGP and how it works.
On the second step you can choose whether to create a new pair of Public and Private PGP keys or import an existing one.
Creating a new set of PGP keys
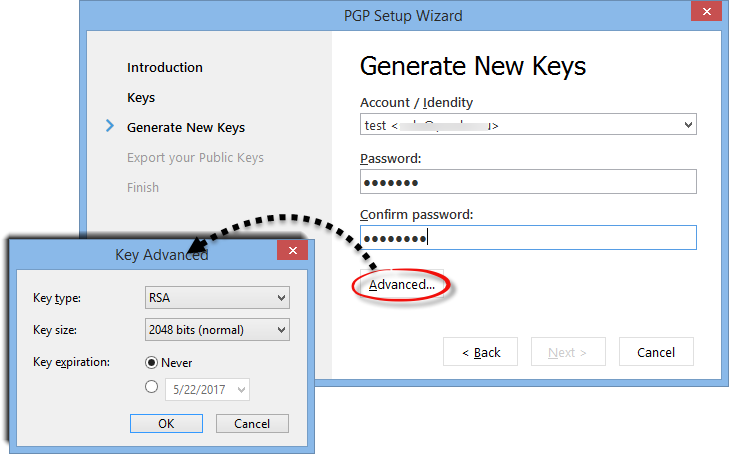
If you chose to create a new key pair, select an account or Identity the key is going to be created for.
Choose a password for the key that will be used for messages signing and decryption.
The Advanced button allows to set additional key pair settings (leaving the default settings unchanged is perfectly fine).
Key type - allows to choose encryption and digital signature algorithms. There are two options: RSA or Elgmal/DSS. RSA is used for both encryption and signature sub keys. In the case of Elgmal/DSS, Elgamal is used for encryption and DSS is for signature.
Key size - choose the encryption strength. The longer the size, the better the protection. However, choose wisely as using long keys may cause delays with encryption/decryption.
Key expiration - if you choose to enter an expiration date, a new key pair will be needed after that date. Your public key will also have the "expired" status and can no longer be used by other people to send you encrypted messages.
The next step of the wizard offers to export your public key to a *.pgp file, so you can distribute it to people you plan to exchange email with.
Importing PGP keys
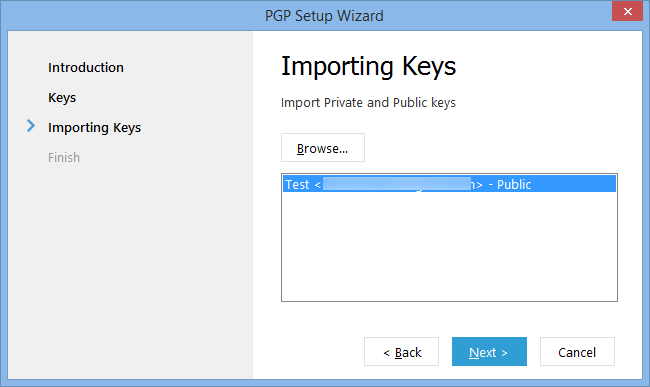
If you choose not to create a new set of PGP keys, you will be redirected to the importing keys step. Click on Browse and locate a file that contains your private and public keys and/or files with public keys of people you are going to correspond with.
Once you've imported public keys for recipients, you will be able to start sending encrypted messages to the key owners. To encrypt a message go to the PGP menu and enable Encrypt message in the composing new message window. Your email message will be encrypted upon clicking the Send button. Any attachments will be encrypted as well.
Having a PGP private key digitally signs email messages, which tells the recipient that the email originates from you. To add a digital signature enable the Sign message option under the PGP menu.
EssentialPIM tries to decrypt messages automatically upon reading them. You can tell encrypted messages by the lock icon.
![]()
If your PGP key is password protected (which it should be), you'll be asked for a passkey when attempting to read an encrypted message.

Remember password for X minutes prevents EssentialPIM from asking the password for a defined period of time. This might be useful when you need to read more than one message at a time.
When a message is successfully decrypted, EssentialPIM adds a corresponding sign Decrypted message in the header part of the message preview window.

If a message was signed and the signature is confirmed, the following sign will be shown:

When a message decryption fails (either there is a problem with your password or there is no Private key for the message recipient), you will see this message:
