You can edit contacts directly from the main view by single clicking on the field. Which fields are displayed can be easily adjusted by right clicking on one of the column names to show the list of fields.
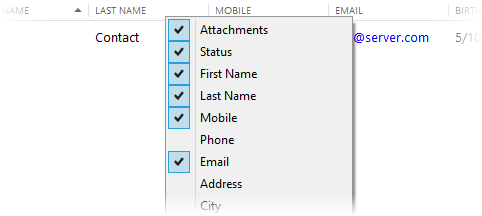
To change the order of the fields, drag & drop them into desired positions.
|
EssentialPIM remembers the order of fields for each of the contact groups. |
Contact Views
To get access to all contacts fields, open the Contact Info dialog. Double click the contact or select it and click the Edit button on the tool bar.
There are two main contact views. One show contacts fields in categorized groups and can be found under the Contact tab. Second view is more compact and lists all fields in one table, it can be found under the All Fields tab. Overview of the tabs can be found below.
Contacts tab (default):
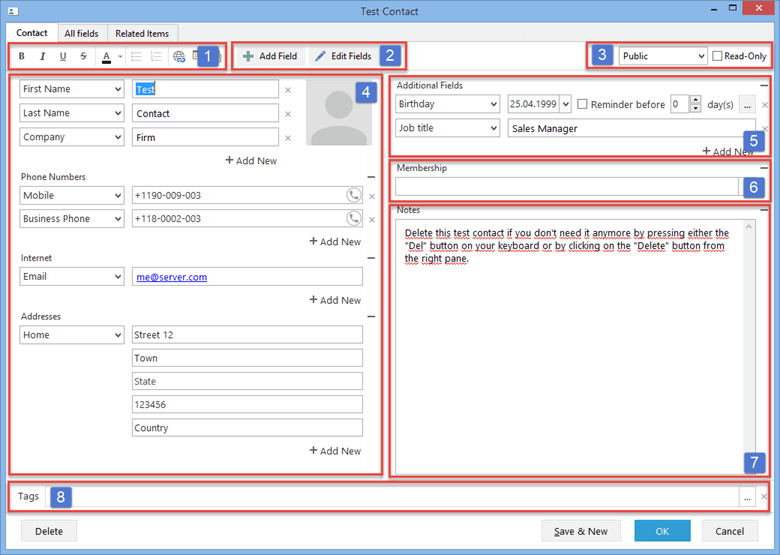
1. Text formatting toolbar.
2. Field management tools, allow you to edit fields layout of all contacts.
3. Item access tools, allow you to mark items as read-only and change their statuses. These options affect different kind of access aspects in the program like synchronization, password protection. Status is also used in EssentialPIM Business for assigning items to other users. Please refer to the Assigning items topic for more details.
4. The main info area, it constrains name, picture and all kind of contact info.
5. Additional fields that can contain various data types like anniversaries or any other custom created fields.
6. Membership shows groups the contact belongs to. Find more about this field here.
7. Notes area represents a simple text editor, here you can add notes and file attachments.
8. Here you can add tags. Find more about working with tags here.
All fields tab:
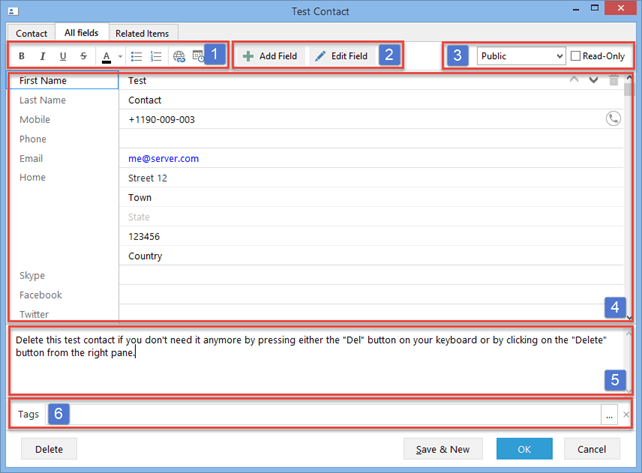
1. Text formatting toolbar.
2. Field management tools, allow you to edit fields layout of all contacts.
3. Item access tools, allow you to mark items as read-only and change their statuses. These options affect different kind of access aspects in the program like synchronization, password protection. Status is also used in EssentialPIM Business for assigning items to other users. Please refer to the Assigning items topic for more details.
4. Contact info area, consisting of all fields including default ones like name, phone, address and etc, as well as custom user defined fields and membership field.
5. Notes area represents a simple text editor, here you can add notes and file attachments.
6. Here you can add tags. Find more about working with tags here.
All contact fields are also shown at the bottom of the main view.
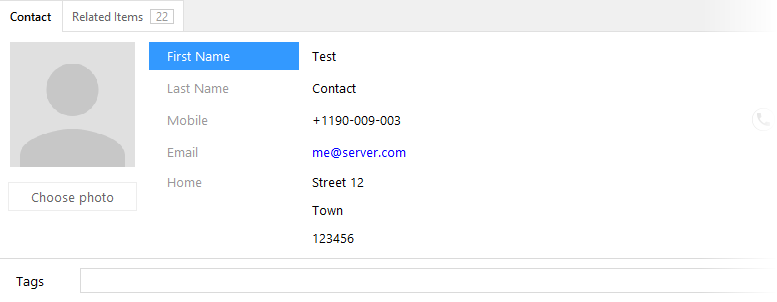
Contacts - represents summarized data of a contact and also allows you to edit data.
Related Items - shows items that have links to the current contact and all emails sent from/to email addresses mentioned in the contact details.
Custom Fields
Most of the contact fields can be edited. To edit an existing or add a new field, open any contact and use buttons at the top of the dialog window or press on Add New in the necessary section of the dialog to add new field.
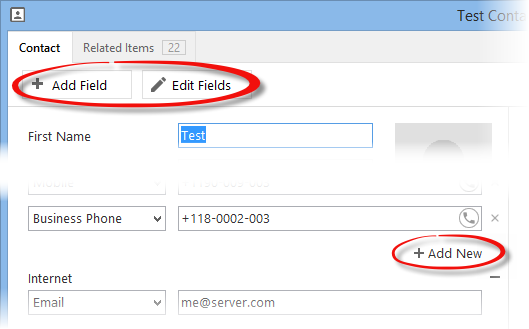
Add Field - creates a new custom field where you can choose the field type.
Add New - add a field of the same type as other fields in the section.
Edit Field - allows to edit any of existing fields.
Contact fields can contain different types of data such as text, date and time, drop-down list and others. You can choose the data type for a field when creating a new field or editing an existing one.
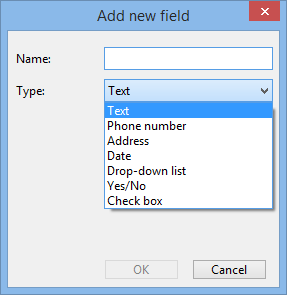
Text - contains text or numeric data.
Phone number - stores phone numbers and can be used for dialing.
Address - stores addresses.
Date - stores dates that you can use in Calendar to create annual events like birthdays, holidays,anniversaries, etc.
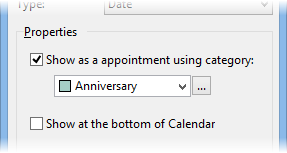
Show as appointment using category - automatically creates an event in Calendar. You can assign a certain category for an event.
Show at the bottom of Calendar - adds a notification at the bottom of the Calendar, three days prior to the event.
Drop-down list - contains list of items available from the drop-down list.
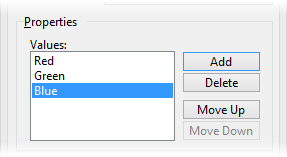
Add and Delete buttons allow you to create new values. Up and Down buttons allow you to adjust their order.
Yes/No - creates a drop-down list containing Boolean values like yes/no, false/true, etc.
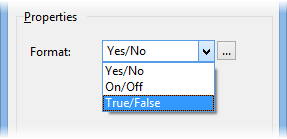
Format choose a pair of pre-defined values or add your own by clicking on the button with tree dots.
Check Box - a simple checkbox that can be either enabled or disabled.
|
Note, changes to the fields apply to all contacts in the database. |
|
Fields First Name, Second Name and Membership cannot be deleted as they are core fields used in synchronizations, but you can rename the First Name and Second Name fields. Membership field is not editable. |
