Once mail accounts are created, you can start working with mail.
Receiving mail
The easiest way to start receiving mail is to click on the Get Mail button on the tool bar. If you need to receive mail from a particular account only, navigate to Tools -> Receive and select the desired one.

If anything goes wrong during the process, an error message will appear in the status bar. Double-clicking on status line opens a dialog with more details.

If you need to stop send/receive mail processes, click on the Stop All button or select a single account and click on the Stop Task button.
Messages from all inboxes are easily accessible in the All Inboxes folder, which is at the top of the mail accounts list. To hide the All Inboxes folder, click on View -> All Inboxes.

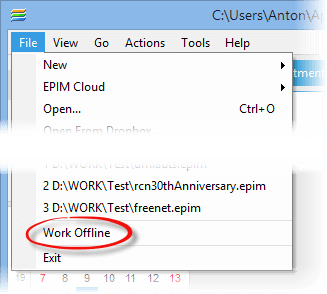
If you don't have an Internet connection at the moment or wouldn't want EssentialPIM to automatically check for new mail, turn on the offline mode. To do so, click on File -> Work Offline. Alternatively, you can click the Offline mode icon located at the bottom-right corner of the program window.
|
Ctrl+Shift+V - send and receive all mail. |
Creating and sending mail
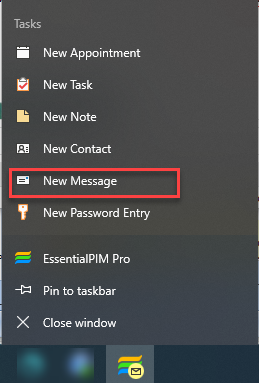
- To create a new message, click on the New Message button from the tool bar or navigate to Actions -> New Message. EssentialPIM also allows you to create a new message quickly even when it is minimized. This can be done by right-clicking on the EssentialPIM icon in the taskbar and selecting the "New Message" option from the menu that appears.
- To reply to a message, click on Reply or Reply All. When Reply All is used, each recipient will be mentioned in the Cc (carbon copy) field.
- To forward a message to another person, click on the Forward button.
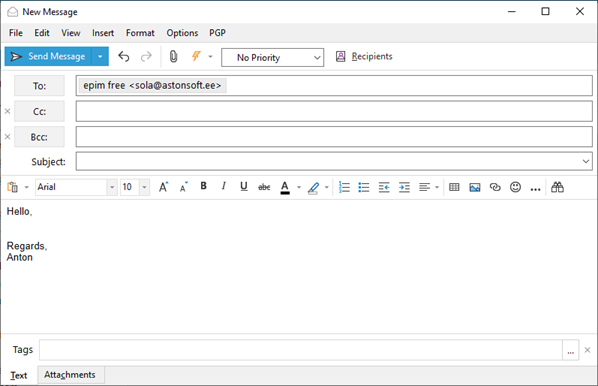
You can send mail in rich text format (RTF), in (HTML) or in plain text. To switch between formats, click on the Format menu.
From field includes all identities from all mail accounts. Changing the sender will automatically change the associated signature in the message.
Click on the To, Cc and Bcc buttons for a dialog window to Select Recipients.
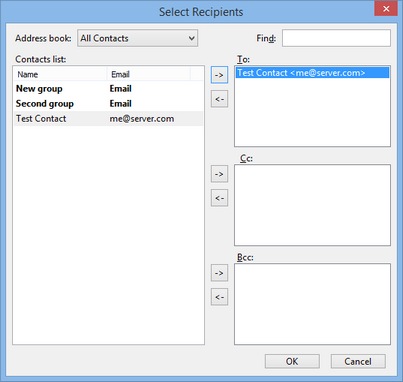
The left part of the window shows the list of all contacts in your database. The arrows in the middle allow you to add selected contacts into different fields (To, Cc, Bcc) of a mail message. To filter contacts, use the Address book drop-down list (allows to filter by contact groups) or Find field.
Once the message is ready, you can send it immediately by clicking on the Send Message button. To save it as a draft, click on File -> Save as -> Drafts or just close the window (EssentialPIM will ask whether to save it for later use). Messages will be saved in the Drafts folder.
Ten latest email subjects will be saved in the database so that you can re-use them later. You can select previously used saved subjects from the drop-down list.
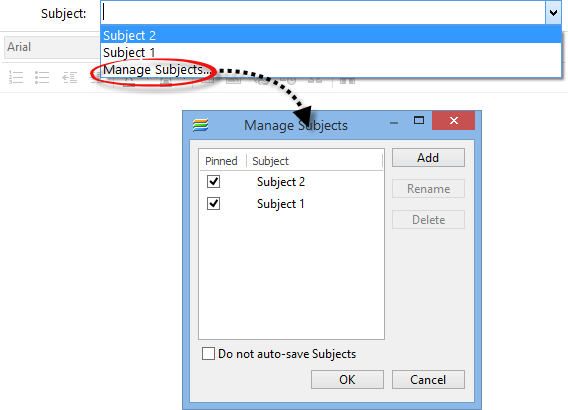
To edit or pin saved subjects, select the Manage Subjects option. This will open up a dialog window where you can do all that.
If the Do not auto-save Subjects option is enabled, EsentialPIM will not save entered subjects automatically anymore.
Quick Reply
Alternative way for quickly sending replies to email messages.
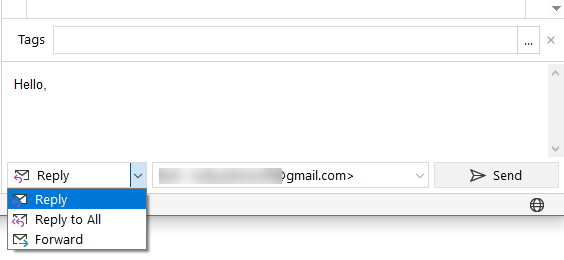
Works the same way as if you were using a regular reply option only without a separate dialog window. Your signature will be automatically added and the original message will be quoted in the outgoing messages. To hide the Quick Reply section, click on View -> Quick Reply Box.
Templates and Canned Responses
Any message can be saved as a template under File -> Save as -> Template. Templates will be saved into a special Templates folder.
You can also save frequently used phrases as canned responses and insert them into email messages any time. Open a new mail message window and click on Insert -> Canned response -> Manage.
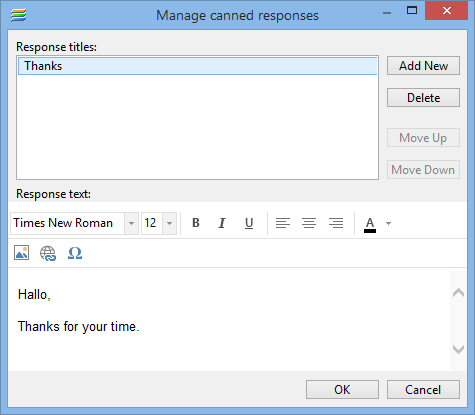
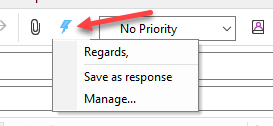
This dialog window provides the option to add and modify canned responses for your messages. These canned responses can be quickly inserted into new messages by selecting Insert -> Canned responses or by using the toolbar button.
|
You can add a read receipt request to a message under Options -> Request Read Receipt. |
|
Ctrl+D - send a message. |
Mail settings
"Mail settings can be accessed via Tools -> Options -> Mail. The settings are organized into multiple sections, with general mail settings located in the root Mail section.
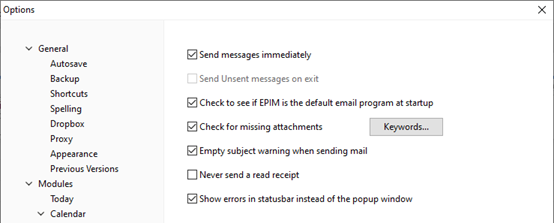
Send messages immediately - when enabled, clicking on the Send Message button sends the message immediately. When disabled, the message goes into the Outbox folder where it stays until you send it later manually.
Send Unsent messages on exit - sends all messages from Outbox upon closing EssentialPIM. This feature is useful if the "Send messages immediately" option is disabled.
Check to see if EPIM is the default email program at startup - enable it if you wish EssentialPIM to be the default email client in the system.
Check for missing attachments - reminds you to add an attachment upon clicking the Send Message button if a keyword is mentioned in the message text. Pressing the Keywords button allows you to edit the list of keywords.
Empty subject warning when sending mail - prompts you to add a subject if the subject line is left empty.
Never send a read receipt - when enabled, EssentialPIM will not send read confirmation emails.
Show errors in status bar instead of the popup window - when enabled, EssentialPIM no longer displays the Send/Receive status dialog as a popup when an error occurs during the automatic mail check. Instead, the error is shown in the status bar, allowing you to stay informed without interrupting your workflow.
Display & Compose provides some additional options to tune up your work flow.
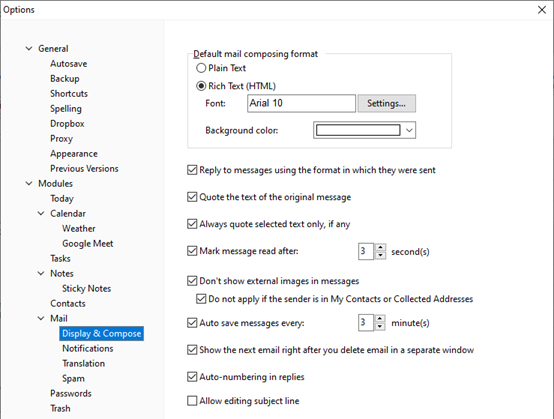
Auto save message every... - automatically saves messages that are being edited every specified number of minutes. Messages will be saved into Drafts folder.
Auto-numbering in replies - adds sequential number into subject each time you reply to a message, making it easier to track your email correspondence.
Notifications section offers options to configure Windows notifications for new mail.

Translation section allows adjustments to auto-translate options for mail. Further details can be found here.
Spam section provides settings for managing the spam filtering feature. Additional information is available here.
|
Note, the portable version of EssentialPIM cannot be set as a default client in the system. |
